2009-12-09

Sound settings in Ubuntu

After a fresh install of Ubuntu (9.04 and 9.10 at least), the sound in my system would be muted as soon as the user logs in. I don't know whether this has to do specifically with the type of sound card (HDA Intel - SigmaTel STAC9227), or something else in my system. I couldn't figure out how to save the volume settings across machine reboots so that sound would be unmuted when the user logs in.

In the end I set up a script to set volume values with Alsa's amixer, and I have this script executed in the ~/.config/openbox/autostart.sh file. I assume the script can be included in ~/.xinitrc as well.

Sample script:

amixer set 'Master',0 100% unmute
amixer set 'PCM',0 100% unmute
amixer set 'Front',0 100% unmute
amixer set 'Surround',0 100% unmute
amixer set 'Center',0 100% unmute
amixer set 'LFE',0 100% unmute
amixer set 'Side',0 100% unmute

2009-06-12

Custom desktop menu on xfce 4.6

Here's a few things I had to do to get a custom right-click desktop menu on XFCE 4.6:

1) Disable desktop icons: You have to use XFCE in "classical" Unix desktop... i.e., no icons on the desktop itself. You can still drag and drop between Thunar windows, but not between Thunar and desktop. To do this, run (from a terminal):

xfconf-query -c xfce4-desktop -p /desktop-icons/style -s 0

2) Next, make sure the desktop menu is enabled:
xfconf-query -c xfce4-desktop -p /desktop-menu/show-icons -s true
xfconf-query -c xfce4-desktop -p /desktop-menu/show -s true

3) Finally, edit your desktop menu as you like. The per-user desktop menu is typically in this file:
~/.config/menus/xfce-applications.menu

As an example, here is my menu file. The "Include" section contains the menu items that will be used in the "Layout" section. Menu items are described by ".desktop" files found in /usr/share/applications/. You can also define your own ".desktop" files, and place them under ~/.local/share/applications/

In the example xfce-applications.menu file shown below, I created a "virtualbox.desktop" file under my local applications directory, because I didn't find one under the system directory /usr/share/applications.

Content of ~/.config/menus/xfce-applications.menu :


<!DOCTYPE Menu PUBLIC "-//freedesktop//DTD Menu 1.0//EN"
"http://www.freedesktop.org/standards/menu-spec/1.0/menu.dtd">


<Menu>
<Name>My_desktop_menu</Name>

<DefaultAppDirs/>
<DefaultDirectoryDirs/>

<Include>
<Filename>xfce4-logout.desktop</Filename>
<Filename>gnome-terminal.desktop</Filename>
<Filename>xterm.desktop</Filename>
<Filename>gnucash.desktop</Filename>
<Filename>keepassx.desktop</Filename>
<Filename>rhythmbox.desktop</Filename>
<Filename>pidgin.desktop</Filename>
<Filename>virtualbox.desktop</Filename>
</Include>

<Layout>
<Filename>xterm.desktop</Filename>
<Separator/>
<Filename>gnucash.desktop</Filename>
<Separator/>
<Filename>pidgin.desktop</Filename>
<Filename>keepassx.desktop</Filename>
<Filename>rhythmbox.desktop</Filename>
<Filename>virtualbox.desktop</Filename>
<Menuname>Applications</Menuname>
<Menuname>Settings</Menuname>
<Filename>xfce4-logout.desktop</Filename>
</Layout>


<Menu>
<Name>Settings</Name>
<Directory>xfce-settings.directory</Directory>
<Include>
<Category>Settings</Category>
</Include>
<Exclude>
<Category>System</Category>
</Exclude>

<Layout>
<Filename>xfce-settings-manager.desktop</Filename>
<Separator/>
<Merge type="all"/>
</Layout>

<Menu>
<Name>Screensavers</Name>
<Directory>xfce-screensavers.directory</Directory>
<Include>
<Category>Screensaver</Category>
</Include>
</Menu>
</Menu>


<Menu>
<Name>Applications</Name>

<Menu>
<Name>Accessories</Name>
<Directory>xfce-accessories.directory</Directory>
<Include>
<Or>
<Category>Accessibility</Category>
<Category>Core</Category>
<Category>Legacy</Category>
<Category>Utility</Category>
</Or>
</Include>
</Menu>

<Menu>
<Name>Development</Name>
<Directory>xfce-development.directory</Directory>
<Include>
<Category>Development</Category>
</Include>
</Menu>

<Menu>
<Name>Education</Name>
<Directory>xfce-education.directory</Directory>
<Include>
<Category>Education</Category>
</Include>
</Menu>

<Menu>
<Name>Games</Name>
<Directory>xfce-games.directory</Directory>
<Include>
<Category>Game</Category>
</Include>
</Menu>

<Menu>
<Name>Graphics</Name>
<Directory>xfce-graphics.directory</Directory>
<Include>
<Category>Graphics</Category>
</Include>
</Menu>

<Menu>
<Name>Multimedia</Name>
<Directory>xfce-multimedia.directory</Directory>
<Include>
<Category>Audio</Category>
<Category>Video</Category>
<Category>AudioVideo</Category>
</Include>
</Menu>

<Menu>
<Name>Network</Name>
<Directory>xfce-network.directory</Directory>
<Include>
<Category>Network</Category>
</Include>
</Menu>

<Menu>
<Name>Office</Name>
<Directory>xfce-office.directory</Directory>
<Include>
<Category>Office</Category>
</Include>
</Menu>

<Menu>
<Name>System</Name>
<Directory>xfce-system.directory</Directory>
<Include>
<Category>System</Category>
</Include>
<Exclude>
<Filename>gnome-app-install-xfce.desktop</Filename>
</Exclude>
</Menu>

<Menu>
<Name>Other</Name>
<Directory>xfce-other.directory</Directory>
<OnlyUnallocated/>
<Include>
<All/>
</Include>
<Exclude>
<Category>X-Xfce-Toplevel</Category>
</Exclude>
</Menu>
</Menu>

</Menu>

2009-05-23

Verify DNIe Linux software's signature

The spanish electronic national identity card, known as DNIe (Documento Nacional de Identidad Electrónico) contains user certificates for authentication and for signature.

It can be used on Linux, Windows, and MacOSX systems, and the Spanish Ministry of Interior distributes software for each platform to enable the use of the DNIe. The official webpage is http://www.dnielectronico.es/. Software packages and related documents are distributed along with a signature file to verify their authenticity and integrity, before you use them on your computer.

The DNIe website states that OpenSSL is used to verify the signature, but they don't provide step-by-step instructions to make it easy for users to verify signatures (in fact they claim that the signature "will be useful for users with advanced computer knowledge who wish to verify the integrity of the software packages", which I think is not very nice on the part of the Ministry, as they should promote signature verification by making it easy for people who don't know how to do it, not only experts). Even after searching on the Internet, I found no quick guide to help the novice user verify those signatures.

It turns out they do use OpenSSL to sign their files, but they omit some details, which I wish to document in this post: They distribute a certificate file, of which one needs to extract the key first, and they used SHA1 for the digest for the signature.

They provide a certificate to verify signatures, found here: http://www.dnielectronico.es/seccion_integradores/cert_fir_cod_des.html

When using OpenSSL to verify a signature, one must provide the public key, but OpenSSL doesn't take the certificate file directly. Therefore, the following steps are needed to extract the public key from the DNIe software signature certificate:

> unzip CertCodeSigning.zip (will output "CertCodeSigning.pem")
> openssl x509 -inform pem -in CertCodeSigning.pem -pubkey -noout > DNIeCodeSigningKey.pem

Now we have the public key in file "DNIeCodeSigningKey.pem".

Finally, we can run the OpenSSL command to verify a signature.
For instance, let's say you have downloaded the following two files: DNIe_v4_0_0.zip and DNIe_v4_0_0.zip.sign (DNIe CSP drivers for Windows).
In order to verify the signature, run the following command:
> openssl dgst -sha1 -verify DNIeCodeSigningKey.pem -signature DNIe_v4_0_0.zip.sign DNIe_v4_0_0.zip

The equivalent command to verify the signature of DNIe software packages for linux would be:
> openssl dgst -sha1 -verify DNIeSoftSigningKey.pem -signature opensc-dnie_1.4.5-1_i386_Ubuntu_Intrepid_Ibex.deb.tar.sign opensc-dnie_1.4.5-1_i386_Ubuntu_Intrepid_Ibex.deb.tar

The result of both commands should be a message "Verified OK". If you get something different, double check the steps above, or make sure you are downloading the right DNIe software.

2009-04-01

Excel 2007 crash on exit

Excel 2007 was crashing on my Windows XP SP3 system almost every time I closed the application.

The solution to this problem turned out to be quite easy... just remove the "send to Bluetooth" add-in that was added to Excel 2007 by the Bluetooth application on my system.

Credits for this solution go to Rasum, found on this page: Excel 2007 crash on exit - solution

2009-03-28

Make Office 2007 look like Office 2003 or XP (Tahoma on Office 2007)

I began using MS-Office 2007 just yesterday, after my work machine was upgraded from Office 2003. (still running Windows XP, thankfully). I couldn't stand the look of Office 2007 for two seconds. I think antialiased fonts are very hard to read on LCD screens, so I always run to disable antialiasing on any machine I need to work with for more than 1 hour straight.

Unfortunatelly, MS-Office 2007 only has a setting to disable the use of "ClearType", but nothing more. After disabling it you do get a cleaner interface, without antialiased fonts, but you are left with an ugly font. After some snorkeling around the 'net, I learned that the font used in MS-Office 2007 is called "Segoe UI", but there is no switch to select a different font, as you can do with the rest of the Windows XP user interface.

The goal: To have Office 2007 use non-antialiased Tahoma 8pt in its user interface, like the rest of the standard Windows XP interface (with "ClearType" disabled).

The solution: This solution could be labeled as "brute force", but I couldn't find another one (if someone knows a better way, please leave a comment on this post). It basically consists of replacing Segoe UI font files with another copy of the Tahoma file, and this requires some tweaking on the font files:

1) Disable "ClearType" in Office 2007 applications. Open Word 2007, and click on the "Office button" and then on "Word options". Under the "Popular" section, disable "Always use ClearType", and hit OK.
2) Close Word 2007.
3) Make a new folder on your Desktop, called "segoe_fonts", and two subfolders: "segoe_real" and "segoe_fake"
4) Make a back-up copy of these two Segoe UI font files: SEGOEUI.TTF and SEGOEUIB.TTF (copy them from C:\windows\Fonts to ...\Desktop\segoe_fonts\segoe_real
5) Copy tahoma.ttf and tahomab.ttf from C:\windows\Fonts to ...\Desktop\segoe_fonts\segoe_fake
6) Under "segoe_fake", rename tahoma.ttf and tahomab.ttf to SEGOEUI.TTF and SEGOEUIB.TTF respectively.
7) Use a font editing utility (for instance, FontCreator by High Logic). Open the font files using "Open"->"Font File", and select the files under "segoe_fake". The fileds should be changed on those fonts as follows (under "Format", "Naming" in the FontCreator tool):


8) Save the two font files after the changes.
9) Copy the two font files from "segoe_fake" to C:\windows\Fonts (first you will have to delete the original SEGOEUI.TTF and SEGOEUIB.TTF files in there)
10) Open MS-Word 2007 or other Office 2007 application to enjoy the same Tahoma 8pt font used by Windows XP in general, on the Office 2007 interface. It probably does not make a big difference on Word or Excel, but it does make a very big difference in Outlook, where the list of messages is shown using the interface font (Segoe UI vs. Tahoma).

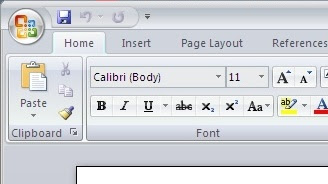
Here are some screenshots of Office 2007 before and after this "brute-force" change:

The regular look of Office 2007 on Windows XP:


Office 2007 with the fake Segoe UI font file installed on Windows XP, with Tahoma on the interface:


Conclusion
Is there another way to do this? I would prefer not to fiddle with font files, but my attempts at changing the Office 2007 user interface font using the Windows XP registry were unsuccessful. There is a key HKEY_LOCAL_MACHINE\SOFTWARE\Microsoft\Windows NT\CurrentVersion\FontSubstitutes that contains some mappings from one font to another. I tried entering "Segoe UI"="Tahoma" in there, but that did not work. If anyone reading this post knows how to do it differently than my brute force method, I'd love to hear about it.